Enabling reCaptcha for Helcim.js
Protect against card testing and secure your Helcim.js transactions through your website using reCaptcha.
reCaptcha is intended to protect websites from fraud and abuse without creating friction for the user interacting with the website. This is recommended as a security measure to protect Helcim merchants using our API products and services to process transactions, as websites without reCaptcha are often targeted in order to complete card testing.
Enabling reCaptcha for Helcim.js is a quick and simple process and will ensure that transactions below your risk threshold are not processed through our API.
How does reCaptcha work for Helcim.js?
The script tag to trigger reCaptcha is copied onto the page of your website where Helcim.js is implemented. Once the reCaptcha check is triggered through the helcimProcess action on your website, the score is collected then passed to Helcim via a hidden HTML input field. Helcim will compare that score to the threshold set in the Helcim.js configuration. If it passes, it will process the transaction. If it fails, it will decline instead.
How to enable reCaptcha for Helcim.js
First you'll want to toggle Require Captcha on for your Helcim.js configuration. If you don't yet have a Helcim.js Configuration, you can review our documentation on how to create a new Helcim.js configuration.
- Click on
All Tools.

- Click on
Integrations.

- Click on
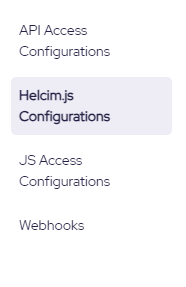
Helcim.js Configurations.
- Select the appropriate Helcim.js configuration that you have implemented in your website or application.

- Under Security Settings, toggle on the Require Captcha setting and set your Captcha Score Threshold.
- Click
Savein the top right corner to save these changes.
Recommend Captcha Score ThresholdWe recommend 0.50 as a good starting place for your Captcha Score Threshold. This can always be amended if you find too many legitimate customers are being flagged, or not enough bots are being caught.
Required reCaptcha code for your website
Now that reCaptcha is enabled, you need to copy the appropriate script and input elements into your website's HTML, on the page where Helcim.js is implemented.
The following Google reCaptcha Script tag should be copied into the head element of your website, on the page where your customer will process their payments.
<script type='text/javascript' src="https://www.google.com/recaptcha/api.js?render=6LcgxK0UAAAAAH9gzsILRr82KZSLrBcry9RynMn4"></script>When using Helcim.js with reCaptcha, you will need to ensure you call the gcaptcha.ready function using an onclick event on your Helcim.js button element. This ensures that a new reCaptcha code is generated if a payment fails and a customer tries a subsequent payment attempt.
// Example Helcim.js process button element
<input type="button" id="buttonProcess" value="Process" onclick="reCaptcha()">
The helcimProcess() function can then be called within your reCaptcha function, so that the payment is processed once the token has been generated and appended to the g-recaptcha-response element.
function reCaptcha() {

    grecaptcha.ready(function() {
        grecaptcha.execute('6LcgxK0UAAAAAH9gzsILRr82KZSLrBcry9RynMn4', {action: 'helcimJSCheckout'})
            .then(function(token) {
                document.getElementById('g-recaptcha-response').value = token;
                helcimProcess();
            })
            .catch((error) => {
                console.error('failed to get g-recaptcha-response. error: ', error);
            });
    });
}
Add a hidden HTML input field with an id of "g-recaptcha-response", inside the form element on your page that contains the helcimForm id. The function above will append the recaptcha token to that element to pass in your Helcim.js payment request.
<input type="hidden" id="g-recaptcha-response" value="">If the payment attempt meets the threshold set in your Helcim.js Configuration then the payment will be processed, else if the payment does not meet the threshold it will be declined and an error response will be returned.
Testing Helcim.js on a live account with reCaptcha enabled
The following scripts should only be used if your Helcim.js Configuration is currently in test mode and you would like to test with reCaptcha enabled on a live account. For testing on a developer test account, you can utilize the scripts and examples above.
You can use the following test reCaptcha scripts and functions instead of the ones outlined above.
Your Helcim.js Configuration should have Test Mode toggled on and you will need an additional HTML input element with the id of "test" and a value of 1.
<head>

  <script type='text/javascript'src="https://www.google.com/recaptcha/api.js?render=6LdixK0UAAAAABmBXVo_jyFJSkQ5Doj9kloLyxGG"></script>

</head>function reCaptcha() {
grecaptcha.ready(function() {
grecaptcha.execute('6LdixK0UAAAAABmBXVo_jyFJSkQ5Doj9kloLyxGG', {action: 'helcimJSCheckout'})
.then(function(token) {
document.getElementById('g-recaptcha-response').value = token;
helcimProcess();
})
.catch((error) => {
console.error('failed to get g-recaptcha-response. error: ', error);
});
});
}Add a hidden input field with an id of "g-recaptcha-response", and one with an id of "test" and a value of 1, should be added into the form element on your page that contains the helcimForm id.
<input type="hidden" id="g-recaptcha-response" value="">
<input type="hidden" id="test" value="1">
Helcim.js in test modeIf testing Helcim.js in test mode on a live account, then please review the following documentation on Testing your Helcim.js Integration.
Updated over 1 year ago