
HelcimPay.js Implementation
This reference details the steps for rendering the HelcimPay.js modal using your valid checkoutToken.
This reference explains the process for integrating HelcimPay.js on your webpage to render the HelcimPay.js payment modal and start processing payments.
In order to render the HelcimPay.js payment modal, you must first ensure you have integrated with the checkout session initialization endpoint to receive your checkoutToken.
Rendering HelcimPay.js
The HelcimPay.js modal is an iFrame that is overlaid on your webpage. To display it, first you must add a script tag to the head section of your HTML page with the given source URL, as shown.
<script type="text/javascript" src="https://secure.helcim.app/helcim-pay/services/start.js"></script>
The script allows access to the start.js file that holds the appendHelcimPayIframe() function. This JavaScript function can be invoked in different ways on the webpage, such as by a link, or button that uses an onclick event handler.
When invoked, the function will render the iFrame that displays the modal when called with a valid checkoutToken passed as a parameter.
// Link HTML example
<a href="javascript: appendHelcimPayIframe(checkoutToken)">
  Pay Now
</a>

// Onclick HTML example
// Requires JavaScript onclick event handler

<a href="#" id="pay-now">Pay Now</a>
// Onclick JavaScript example
document.getElementById('pay-now').addEventListener('click', function(event) {
    event.preventDefault(); // Prevent the default anchor behavior
    appendHelcimPayIframe('checkoutToken');
});
The following table presents the parameters that the function takes as input.
| Property | Type | Necessity | Description |
|---|---|---|---|
| checkoutToken | String | Required | The token used for displaying the HelcimPay.js modal. Obtained through the HelcimPay.js Initialization process |
| allowExit | Boolean | Optional | Defaulted to true. A boolean that controls the display of the exit icon in the HelcimPay.js modal. |
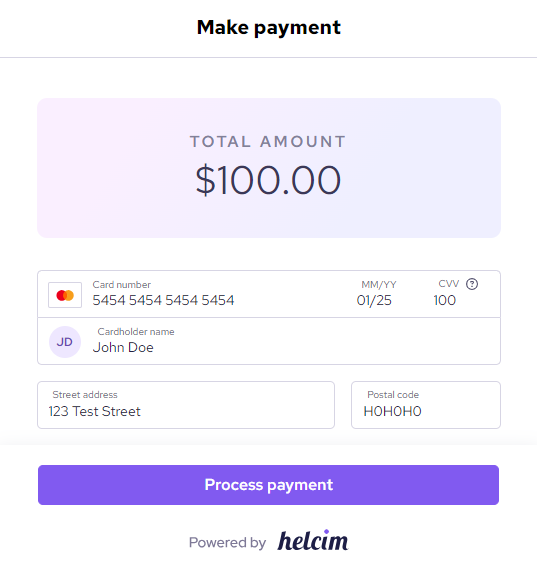
Users can then fill out the form present in the modal with their information and can complete the payment process by clicking on the Process Payment button.
Listening to Response Events
By clicking the Process Payment button, the payment process is initiated. After the process finishes, the transaction response can be retrieved by listening to the response emitted by the iFrame as shown.
window.addEventListener('message', (event) => {

  const helcimPayJsIdentifierKey = 'helcim-pay-js-' + checkoutToken;

  if(event.data.eventName === helcimPayJsIdentifierKey){

    if(event.data.eventStatus === 'ABORTED'){
       console.error('Transaction failed!', event.data.eventMessage);
    }

    if(event.data.eventStatus === 'SUCCESS'){
      console.log('Transaction success!', event.data.eventMessage);
    }

  }

});
Important Note:
The checkoutToken is provided during the HelcimPay.js Initialization process.
The following table summarizes the event variables emitted by the HelcimPay.js iFrame.
| Variable | Description |
|---|---|
| eventName | An identifier that indicates that the postMessage is from the HelcimPay.js iFrame. helcim-pay-js-checkoutToken |
| eventStatus | Indicates the outcome of the transaction process. SUCCESS | ABORTED |
| eventMessage | The response from the transaction process, which can only either be: - A transaction response object that indicates that the process is successful - An error message saying "HelcimPay.js transaction failed - additional-error-message-here" |
Transaction Response
When a HelcimPay.js credit card transaction is processed, the eventMessage contains a JSON.stringify version of the response. Below is an example of a parsed response object.
status: 200
data: {
  data: {
    amount: "100.00",
    approvalCode: "T5E5ST",
    avsResponse: "X",
    cardBatchId: "2578965",
    cardHolderName: "Jane Doe",
    cardNumber: "5454545454",
    cardToken: "684a4a03400fadd1e7bdc9",
    currency: "CAD",
    customerCode: "CST1200",
    dateCreated: "2022-01-05 12:30:45",
    invoiceNumber: "INV000010",
    status: "APPROVED",
    transactionId: "17701631",
    type: "purchase"
  },
  hash: "dbcb570cca52c38d597941adbed03f01be78c43cba89048722925b2f168226a9"
}
When a HelcimPay.js bank transaction is successful, the eventMessage contains a JSON.stringify version of the response. Below is an example of a parsed response object.
status: 200
data: {
  data: {
    amount: "100.00",
    approvalCode: "",
    bankAccountNumber: "100200300",
    bankToken: "fcc48b4cb9a8ecd6531b49",
    batchId: "0",
    currency: "CAD",
    customerCode: "CST1200",
    dateCreated: "2023-04-20 13:56:31",
    invoiceNumber: "INV000020",
    statusAuth: "PENDING",
    statusClearing: "OPENED",
    transactionId: "1020",
    type: "WITHDRAWAL"
  },
  hash: "dbcb570789b3cba8682c43cba899794103f0122adbed6a26e048722925b2f168"
}
The data in the response data can be validated to ensure it was not manipulated, which is covered in HelcimPay.js Validation documentation.
Testing card transaction declines and AVS responses
Testing decline and AVS responses through HelcimPay.js can be achieved by entering specific CVV codes in the payment modal while processing your test transactions. Review our Testing Declines and AVS documentation to learn more.
Updated 11 days ago