Processing with Helcim Fee Saver through HelcimPay
Before initializing your HelcimPay.js checkout session with Helcim Fee Saver you will need to enable this service at a global level within your Helcim account first. Follow the instructions below and pass on your credit card processing fees through HelcimPay!
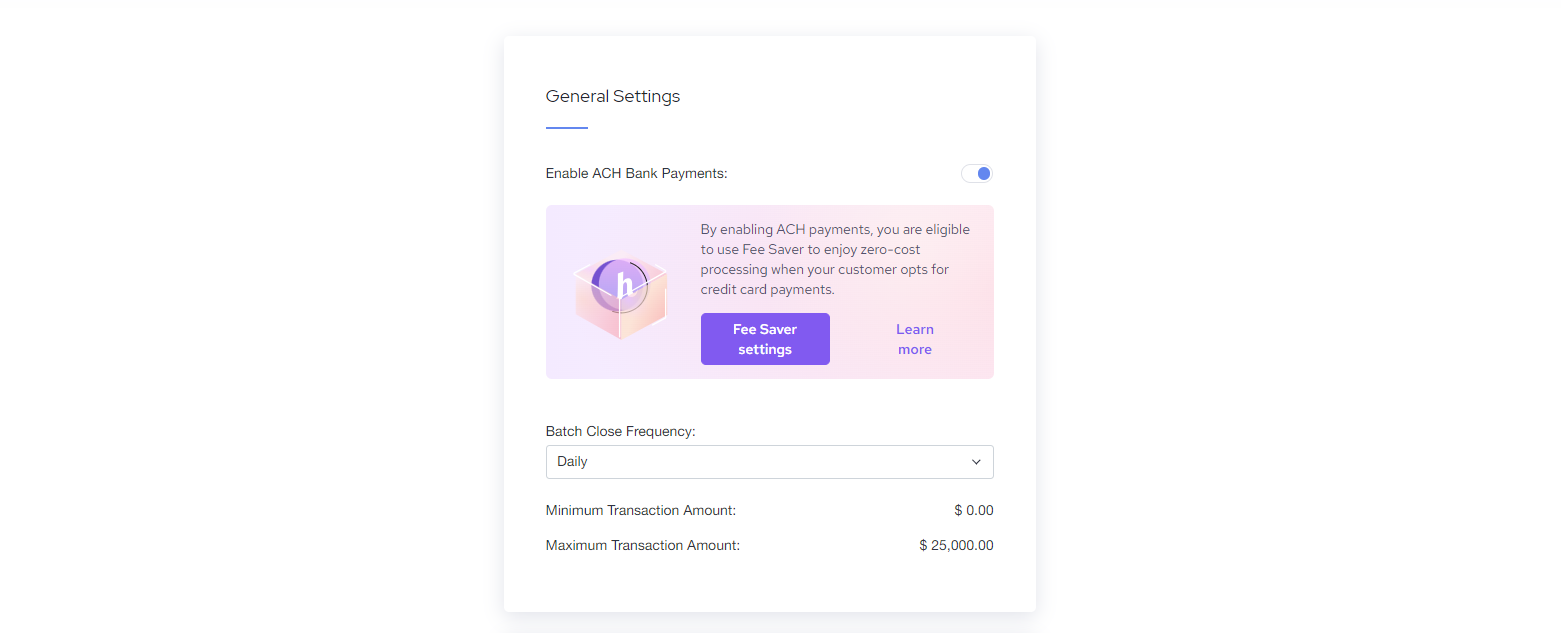
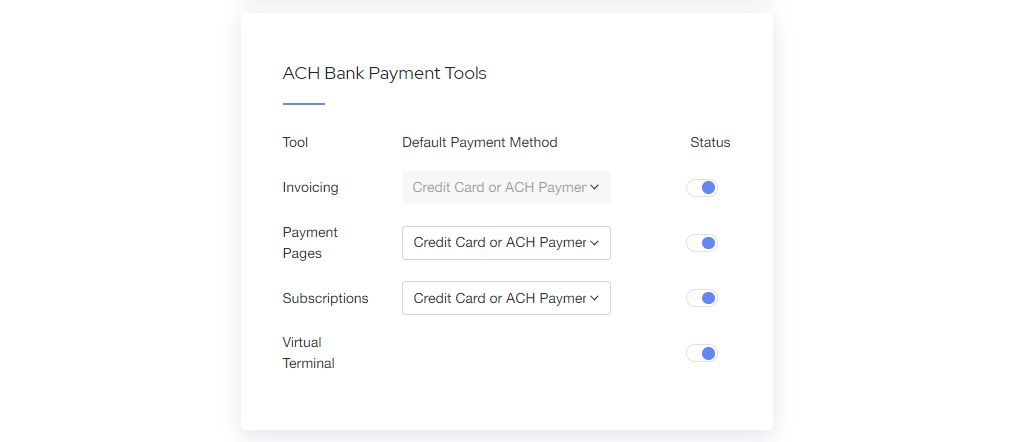
Confirm Invoicing is set to Credit Card and ACH
- Log in to your Helcim account.
- Go to
All Toolsand thenSettings. - Select
ACH Bank Payment Settingsunder Payments and Plans. - Ensure
Enable ACH Bank Paymentsis toggled on.

- Ensure
ACH Bank Payment Toolshas invoicing set to Credit Card and ACH Payment and is toggled on.

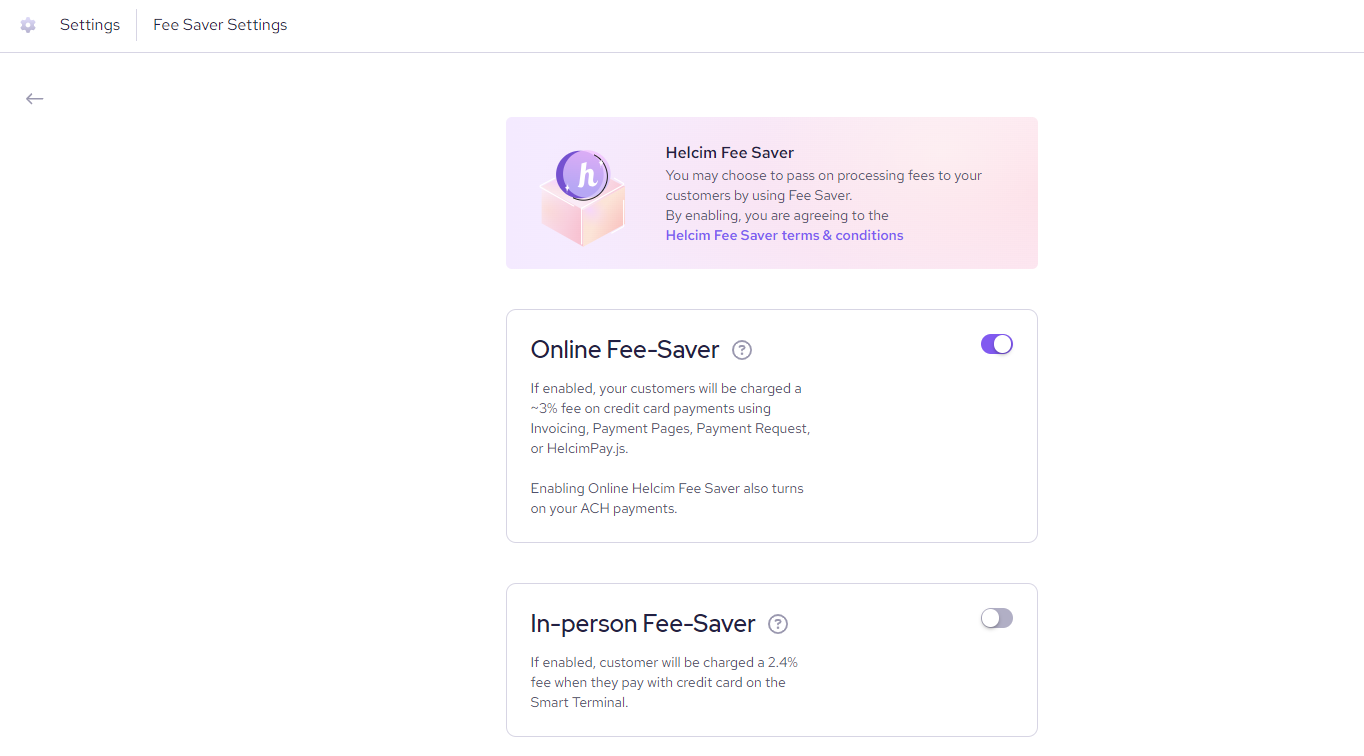
Toggle on Helcim Fee-Saver
- Go to
All Toolsand thenSettings. - Select
Fee Saver Settingsunder Payments and Plans. - Toggle the Online Fee-Saver option on.

Processing with Fee-Saver through HelcimPay.js.
Now that your Helcim account is configured to process with Fee-Saver, you will need to Initialize your HelcimPay.js checkout session with the appropriate parameters.
In addition to the required body parameters of paymentType, amount, and currency, you will also need to pass the appropriate parameters of paymentMethod as 'cc-ach' and hasConvenienceFee as '1'.
With these parameters included, the HelcimPay.js payment modal will render with the appropriate convenience fee displayed for credit card processing and give customers the options to instead process through ACH payment to avoid that fee.
// Example of a HelcimPay.js Initialize request with Fee-Saver

const options = {
  method: 'POST',
  headers: {
    accept: 'application/json',
    'content-type': 'application/json',
    'api-token': 'API_TOKEN'},
  body: JSON.stringify({
    paymentType: 'purchase',
    amount: 100,
    currency: 'CAD',
    paymentMethod: 'cc-ach',
    hasConvenienceFee: 1
  })
};

fetch('https://api.helcim.com/v2/helcim-pay/initialize', options)
  .then(response => response.json())
  .then(response => console.log(response))
  .catch(err => console.error(err));
Updated about 2 months ago